Chapter 02
The first ideas
Before any calculation, hand-drawn sketches, in May 2025. Then AI-generated renders, in June 2026. Then the shape changed three times, each time for a specific reason.
May 2025
My early explorations
It all started on two sheets of squared paper. I was looking for an object that would be forgotten in a bedroom, and would find its place naturally. The numbered markers show what each drawing became.
Sheet 1
The shapes

- 1The diamond. The lens at the centre of a diamond: this is the shape that became the “Diamond” facade of the kork.fr website, then of the prototype.
- 2The pebble. An arrow towards a softer shape. I took it into 3D, before coming back to the diamond (step 6).
- 3The rounded triangle. The lens in a triangle with rounded corners: the corner of the room seen head-on.
- 4The triangle with a “K”. A variant that carries the K of KOR'K.
- 5The hanging versions. Objects hung from a string. I did not keep them.
- 6Three shapes in a corner. A sphere, a cube and a trihedron placed in a wall corner. The trihedron, which fits the corner, became the back of the housing.
Sheet 2
The corner and the components

- 1The trihedron up close. The shape that fits into a wall corner.
- 2The cone of vision. From the corner of the room, what the camera sees. This idea became the placement study: at what height, at what angle (chapter 05).
- 3Version 1, annotated. A camera and a sensor at the centre, a microphone, and a speaker. I set the speaker aside for the prototype: it added nothing to what had to be shown in Nuremberg. I am keeping it as an idea for later: one day, the device may be able to communicate.
- 4The rounded shapes. Trihedrons with softened corners, and a pebble: the leads that followed.
June 2026
The first renders, with Vizcom
I then gave the sketches form with Vizcom, an AI rendering tool. This is where the white diamond with a fabric front appears, the one you find on kork.fr. These images do not show a real object: they helped me choose a silhouette.


November 2026
How the shape evolved, and why
Once in 3D, each shape was checked by calculation before being shown: no component outside the shell, no collision. It was the calculation that ruled out the first one.
-
Step 3
Facet
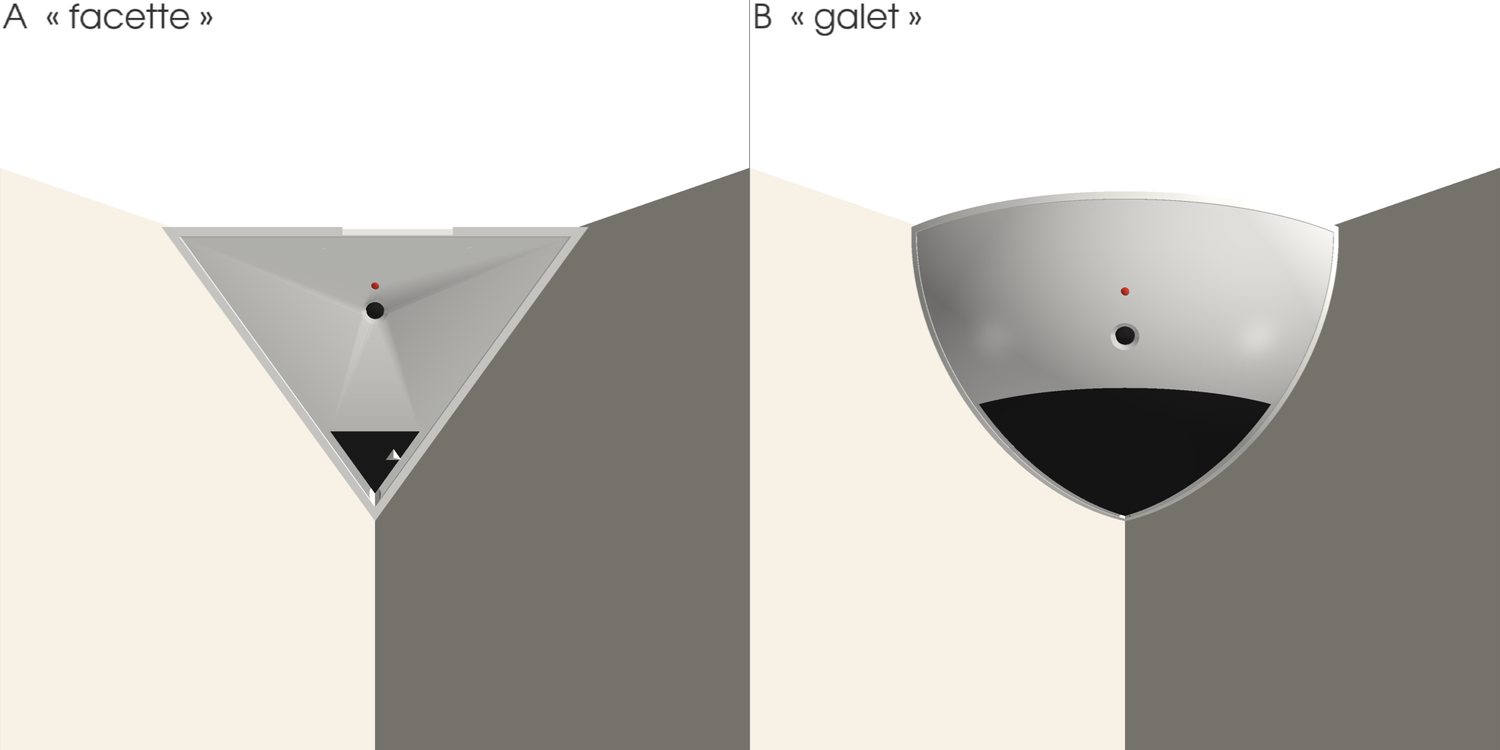
A tetrahedron with a flat face: about 165 cm³ inside, and 87% of the Raspberry Pi stuck out of the shell. It would have had to be enlarged by 40%.
Ruled out by calculation.
-
Step 3
Pebble
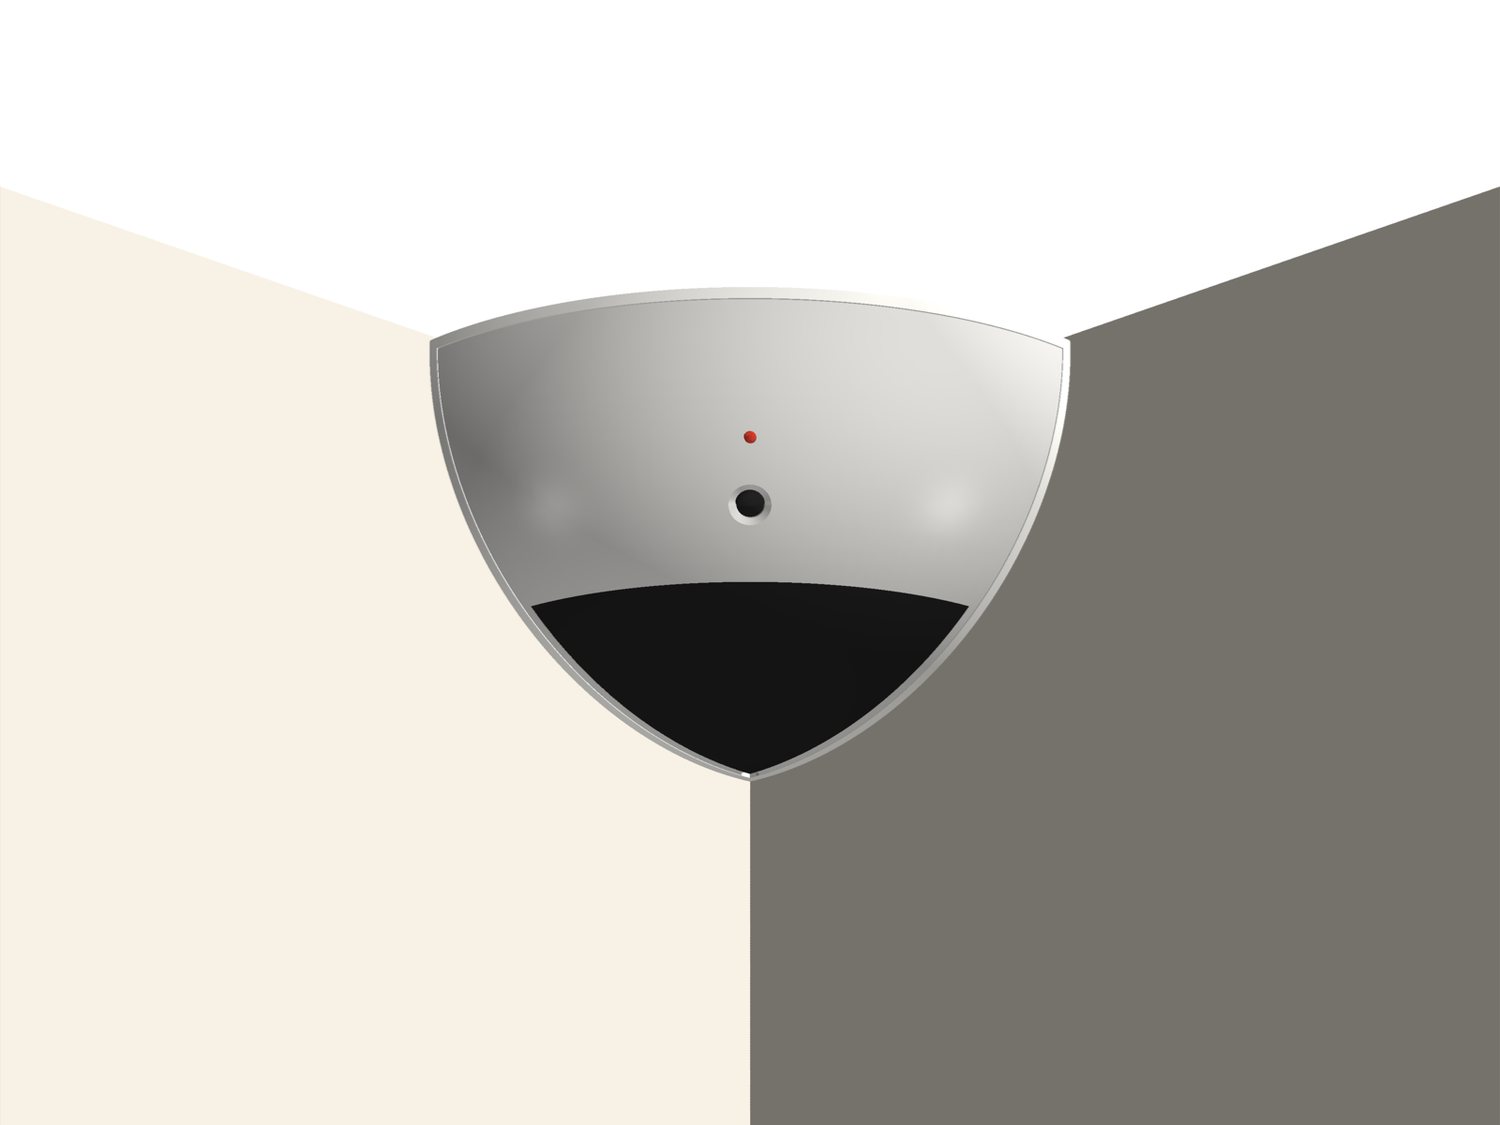
An eighth of an ellipsoid, about 623 cm³: everything fitted, with at least 1 mm to spare.
Kept for a while, then replaced.
-
Step 6
Diamond
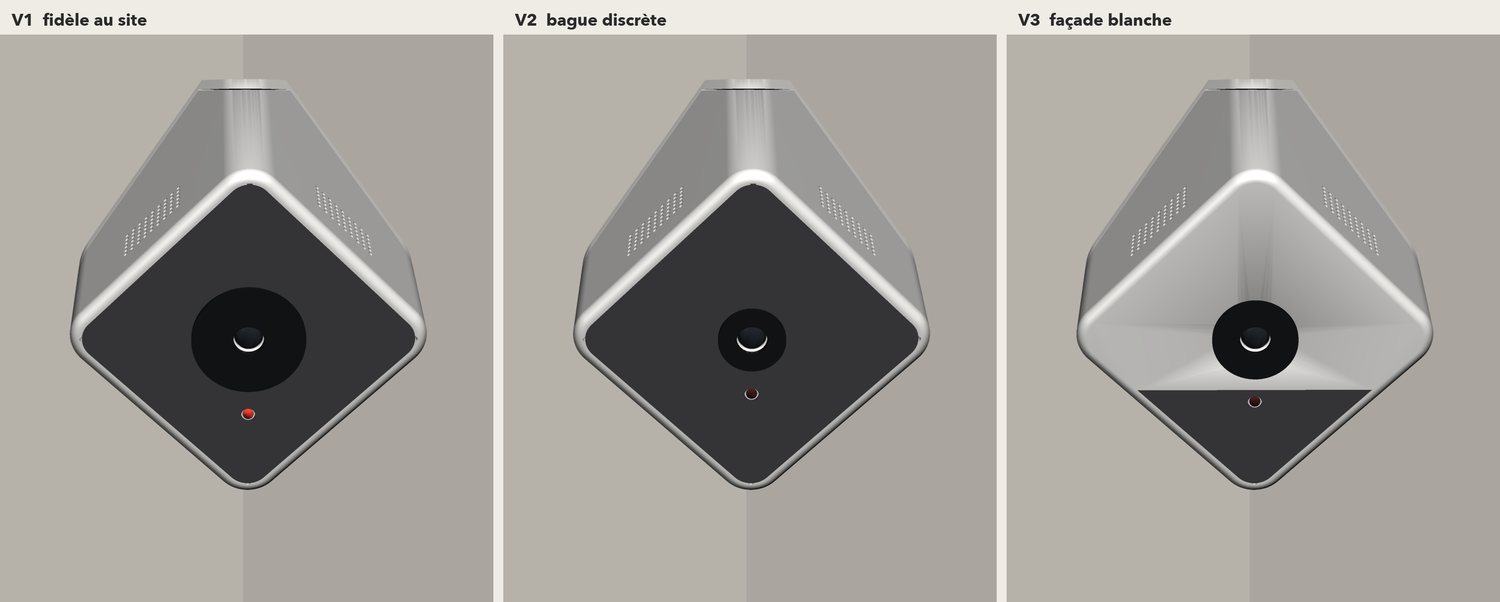
The website's diamond was stronger, and the prototype had to look like what visitors see online. A flat top brings back the trihedron; the camera is tilted by 20°.
Chosen: the V1, true to the website.
-
Steps 7 and 8
V1 with Raspberry Pi 5
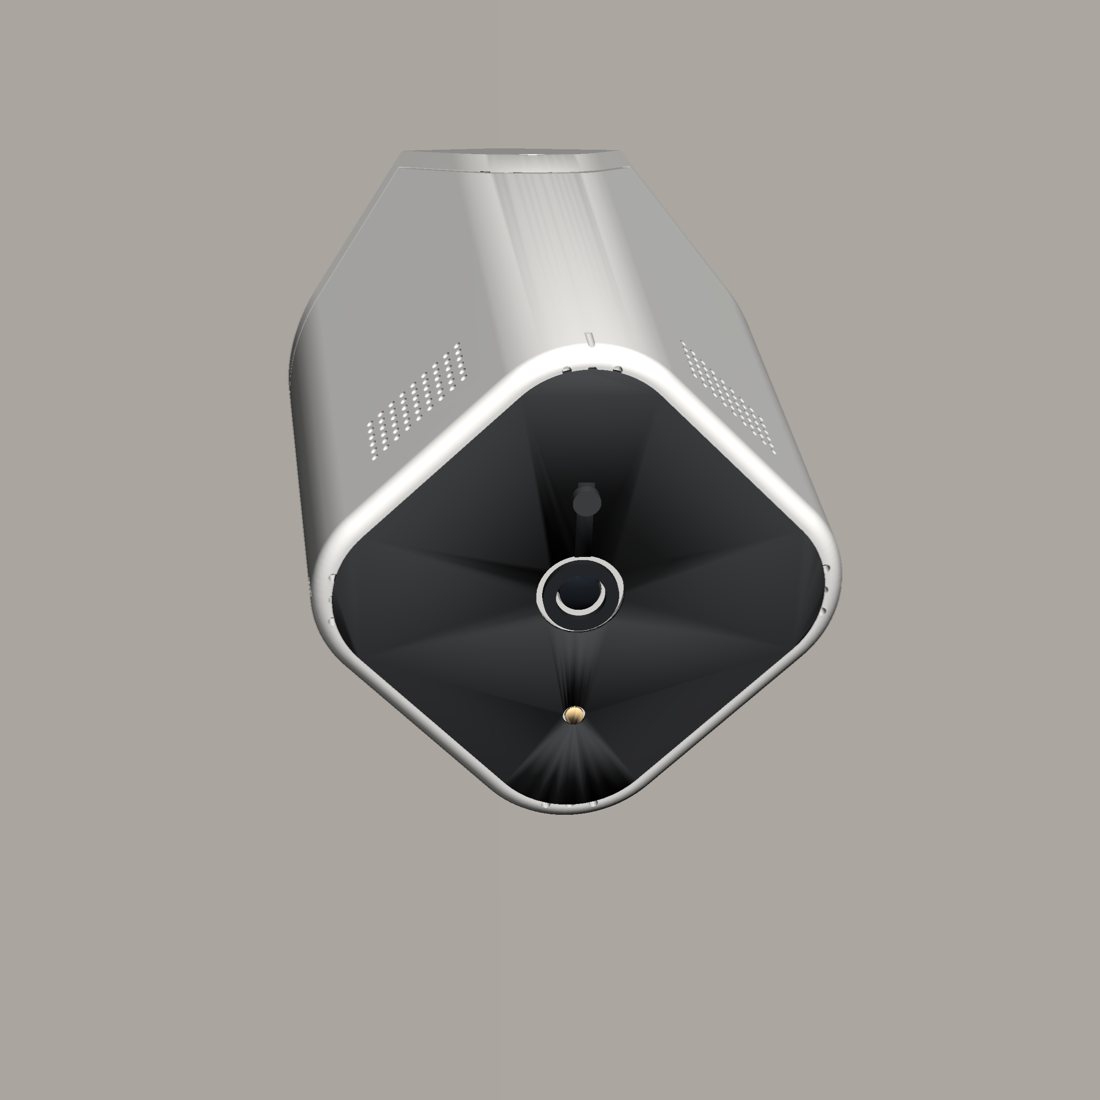
The Raspberry Pi 5 sits on the axis, behind the camera: the housing grows to 12.4 cm along the walls. The facade is softened.
The Nuremberg prototype.


From sketch to prototype
- The diamond from sheet 1 became the facade.
- The trihedron placed in the corner became the back of the housing.
- The cone of vision from sheet 2 became the placement study.
- The speaker was set aside for the prototype, but it remains an idea: one day, the device may be able to communicate.
Step 8
Not looking like a surveillance camera
I wanted an object that works in real life, not only on a stand. I had seven facades rendered, and the one I chose combines more rounded edges, a lens blended into a small dark window, a hidden privacy shutter (a small button slides a white disc in front of the lens) and a warm white indicator light.

Sources: Amdy's sketches (May 2025); Vizcom export (24 June 2026); design journal, steps 3, 6, 7 and 8; decision register (9 Nov 2026).